Hi...I tried a new product...new for me...and I'm not endorsing it and nor am I getting any perks or returns for mentioning it. I thought it sounded interesting, it was on sale and it had free postage...so the time was right to give it a try!!...and I wanted to present it to my Intermediate Painting Class.
The product is Daniel Smith Watercolor Ground. It comes in white, buff, black and transparent. It states that it can be:
"brushed onto anything, let it dry overnight (24-72 hr), and you have a surface that behaves like watercolor paper and holds pigment beautifully. It's soft and absorbent, with a cottony texture similar to cold-pressed paper."
It also says that if you have a section of a watercolor painting that you do not like...just paint on the white ground, let it dry, and then correct the mistake and you have "saved" your painting. See my sample #2 below.
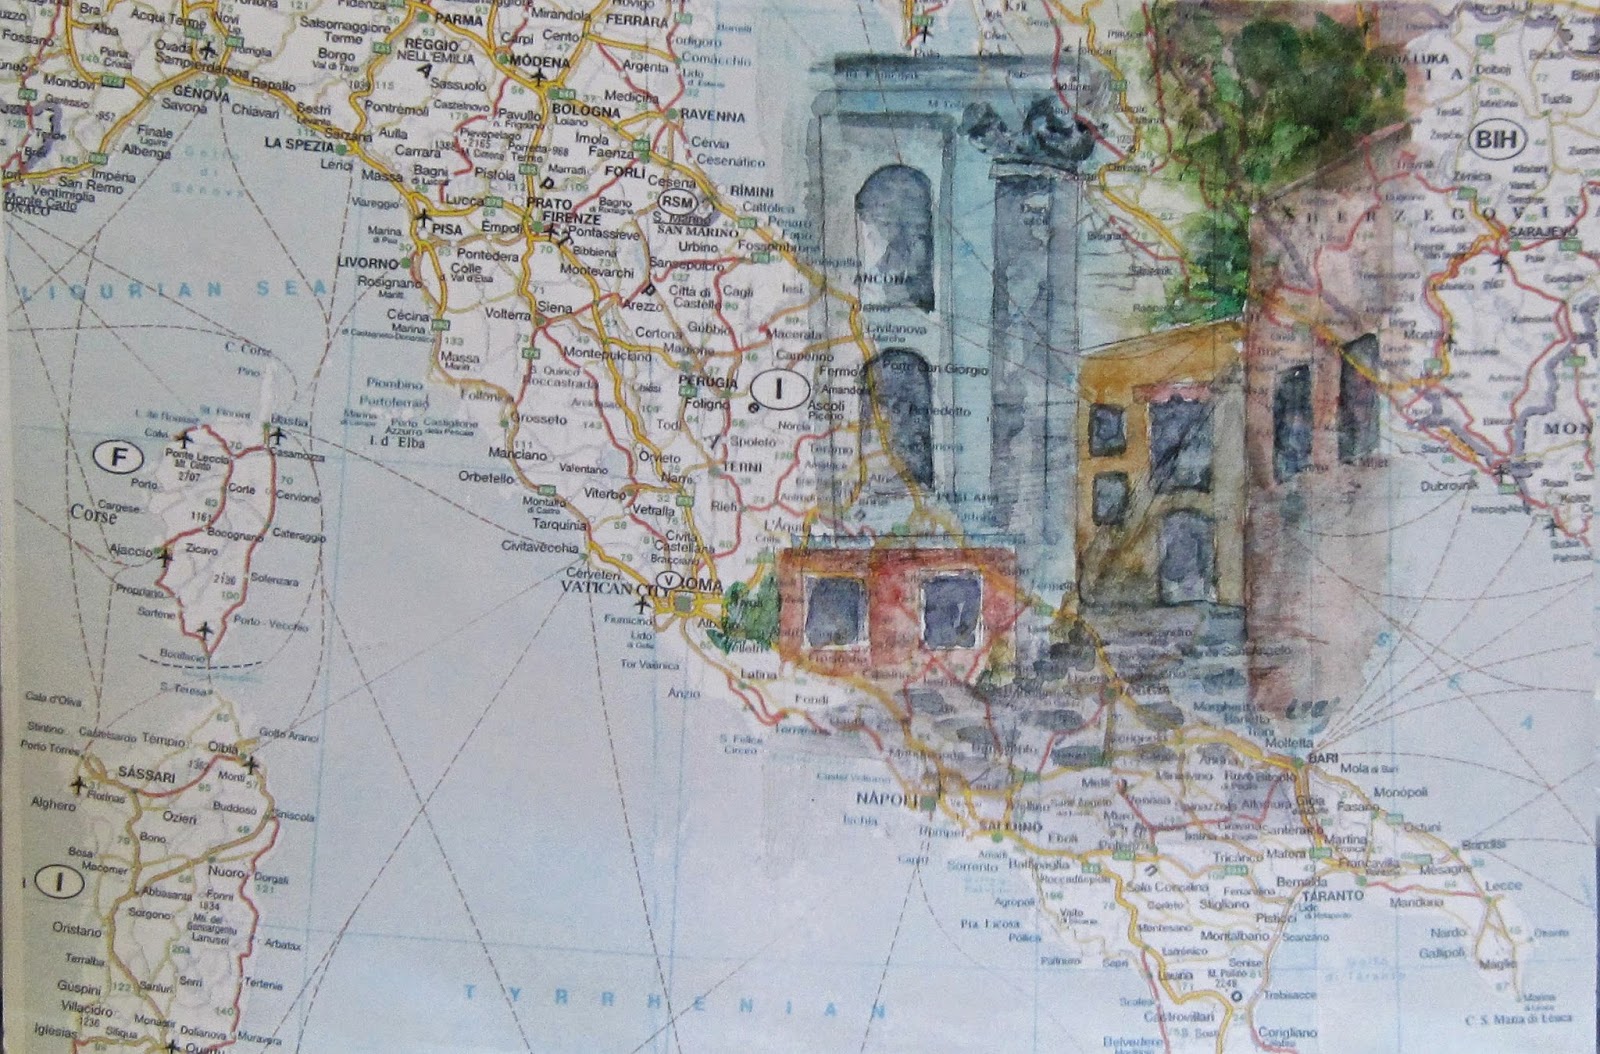
Sample # 1:....What I did was laser printed the map of Italy, glued it to watercolor paper and then brushed on the white ground in a specific area (photos below). I did paint on it before the 24 hours was set (but it was close). It kept the background from showing through the watercolor painting. I did have some bleeding. I will next time, use a foam brush to apply the ground, as the brush left brush marks, not a smooth surface.
Sample # 2...A Plein Air painting (painted on location) I didn't like the first canoe...so I painted the white ground over the canoe and repainted it. I can see where the ground was painted around the canoe.. The blue didn't seem to cover. Again...more practice is needed.
Sample # 3...Again I have my Italy map and I painted the transparent on in the general area as I painted the white. It is definitely hard to see where the transparent was applied. Perhaps...just paint the whole area with the ground and not have to worry where it starts and stops. If you paint watercolor on the untreated map paper...the water can stain it.
So, if you decide to give this product a try...write back of your experience.
Sample #1:
Sample # 2
Sample # 3:
The product is Daniel Smith Watercolor Ground. It comes in white, buff, black and transparent. It states that it can be:
"brushed onto anything, let it dry overnight (24-72 hr), and you have a surface that behaves like watercolor paper and holds pigment beautifully. It's soft and absorbent, with a cottony texture similar to cold-pressed paper."
It also says that if you have a section of a watercolor painting that you do not like...just paint on the white ground, let it dry, and then correct the mistake and you have "saved" your painting. See my sample #2 below.
Sample # 1:....What I did was laser printed the map of Italy, glued it to watercolor paper and then brushed on the white ground in a specific area (photos below). I did paint on it before the 24 hours was set (but it was close). It kept the background from showing through the watercolor painting. I did have some bleeding. I will next time, use a foam brush to apply the ground, as the brush left brush marks, not a smooth surface.
Sample # 2...A Plein Air painting (painted on location) I didn't like the first canoe...so I painted the white ground over the canoe and repainted it. I can see where the ground was painted around the canoe.. The blue didn't seem to cover. Again...more practice is needed.
Sample # 3...Again I have my Italy map and I painted the transparent on in the general area as I painted the white. It is definitely hard to see where the transparent was applied. Perhaps...just paint the whole area with the ground and not have to worry where it starts and stops. If you paint watercolor on the untreated map paper...the water can stain it.
So, if you decide to give this product a try...write back of your experience.
Sample #1:
 |
| White Ground |
 |
| Watercolor painted over White Ground |
 |
| White Ground painted to correct a painting. Can still see the ground around the canoe |
 |
| See the lighter area top right of canoe and in front |
Sample # 3:
 |
| Transparent Ground |
 |
| Transparent Ground...can sort of see the brush strokes and feel the area it was applied |
 |
| Watercolor Painting on the Transparent Ground. I love how the map lines show through...looks like cracks in the walls. |


